Back Care
Subject: Fundamentals of Nursing

Overview
Back Care
Definition
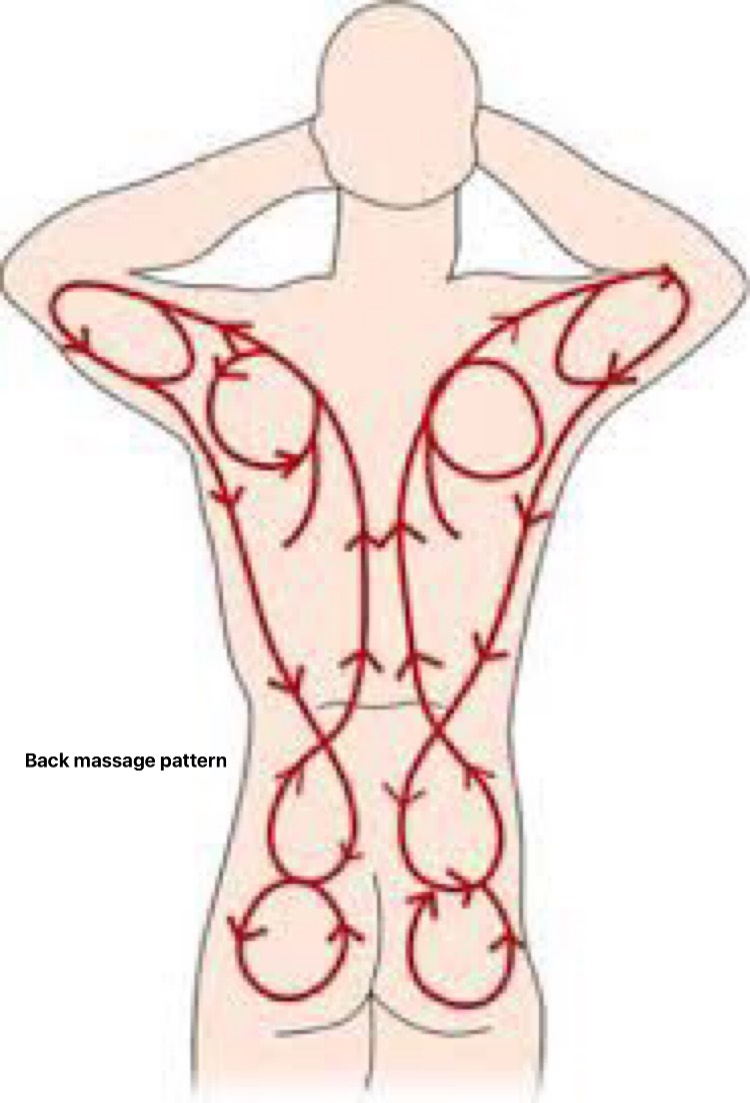
Back care is often called a back rub or the massage of the back. Back massage includes rhythmic stroking, rubbing and squeezing of the tissues of back. Back involves the area from the neck and shoulder to the lower buttocks. It is a scientific form of massaging the back using different massaging strokes to provide cutaneous stimulation and thus promote comfort.
It provides comfort, pleases and relaxes to the patient as well as provides/facilitates the physical stimulation to the skin and the emotional relaxation.
Purposes
- to ease tension in the muscles.
- to both relax and invigorate muscles.
- to encourage sleep and rest.
- to enhance blood flow in order to avoid bed sores.
- to lessen the tension brought on by stress and worry.
- to keep the skin healthy and avoid deterioration.
- to give the chance to check on the patient's back's condition.
Indications
- hospitalized patients,
- patients with a history of low hygiene,
- underweight patients,
- obese individuals,
- very skinny patients,
- severe patients who are not cognizant,
- paralyzed individuals,
- swollen patients,
- patient with mobility loss.
Contraindication
Patient with:
- Ribs fracture,
- Burns,
- Spinal cord injuries,
- Surgeries on back,
- Clotting disorders patient.
- Immediate post-operative period after coronary artery bypass graft, etc.
Principles
- Before and after the surgery, wash your hands.
- Proper justification and discretion ought to be upheld.
- Back care should be provided as part of morning and evening care as well as as required based on the condition and requirements of the specific patient.
- The powder should be used to lessen friction when the skin is oily, wet, and on the verge of breaking.
- When massaging the back, apply more pressure when massaging upwards toward the head and less pressure when massaging downward.
- The nurse must do the procedure with proper body mechanics.
- Maintain adequate positioning for the patient.
- Think about the patient's cultural preferences. If there is any skin discoloration, avoid massaging that person.
- Water should be between 105°F and 110°F.
Articles
- Tray,
- Rubber sheet,
- Medium towel,
- Medium steel bowl -2,
- Sponge towel-2,
- Oil/Power,
- Soap in a dish,
- Warm water.
Procedure
| S.N. | Nursing Action | Rationale |
| 1 |
Check the patient's identification. Explain the purpose and procedure to the patient. |
Ensures that right procedure is performed for right patient. Relieves anxiety and helps patient to cooperate. |
| 2 |
Close the windows and doors. Screen the patient. |
Prevent from draft of air and maintain privacy. |
| 3 | Wash hands. | Prevents from cross infection. |
| 4 | Prepare and bring the articles to the bed sides or near the patient. | Facilitate to perform procedure. |
| 5 |
Adjust bed to Comfortable position. Adjust light, temperature and switch off the fan. |
Ensures proper body mechanics and prevents strain on back muscles. |
| 6 | Wear gloves if needed. | Prevents cross infection. |
| 7 | Position the patient in the prone or lateral/side lying or sim's position with back towards you. | Positioning makes it easier to apply necessary pressure to back muscles. |
| 8 | Expose back shoulders, upper arms and buttocks and cover the rest of the body. | Prevents unnecessary exposure of body parts and prevents excess lotion from touching linen. |
| 9 | Asses the condition of the patient especially back of the patient. | This determines the presence of any conditions of back. |
| 10 |
Place the mackintosh and towel close to the patient's back or under the back. |
Makintosh Prevents the sheet from wetting. |
| 11 | Make mitten with a sponge towel. Wet and squeeze out excess water. | Facilitate the sponging. |
| 12 | Wash/wet the patient's back thoroughly from cervical spine to the coccyx with the help of sponge towel. Use warm water, 105-110°f. | Makes wet skin. |
| 13 |
Apply soap on your hands and then rub the back in circular motion over the shoulder, length of the back and buttocks with smooth and firm strokes. Continue in one smooth stroke from upper back to arm and laterally along side of back, down to iliac crests. Give special attention to bony prominences. Massage at least 3-5 minutes and ringe (squeeze) and dry. |
Gentle, firm pressure applied to all muscle groups promotes relaxation. |
| 14 |
Apply back-rub lotion/oil/powder on your hands and apply hands first to sacral area massaging in circular motion. Stroke upward from buttocks to shoulders. Massage over scapula with smooth, firm stroke. Continue in one smooth firm stroke from upper back to arms and laterally along sides of back, down to iliac crests. Do not take the hands off from patient's back till the end of the procedure. Continue massage pattern for at least 3 minutes (effleurage). |
Gentle, firm pressure applied to all muscle groups promotes relaxation. Continuous contact with skin surface is soothing and stimulates circulation to tissues. |
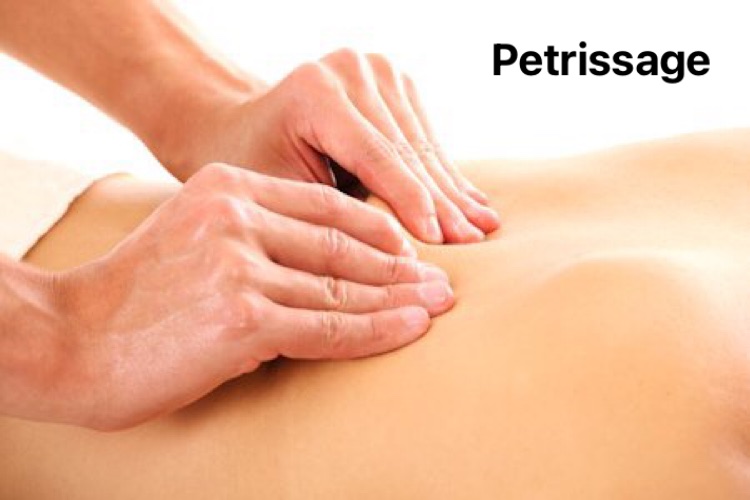
| 15 | Knead skin by gently grasping tissue between your thumb and fingers, knead upward along one side of spine from buttocks to shoulders and around nape of the neck, knead downwards towards sacrum, repeat along other side of back (petrissage). | This activity also helps to improve blood circulation to the tissue. |
| 16 | Perform tapotement (tapping movements with medical aspects of hands on side of spine from sacral region upwards) for 2 minutes. | Provides relaxation to back muscle. |
| 17 | End massage with long, stroking movement for an additional 3 minutes and tell patient you are ending massage. | Long stroking makes soothing effect. |
| 18 | Wipe excess lubricant to back as required. | Excess lotion can act as an irritant and soil sheets. |
| 19 | Remove the mackintosh and towel. | |
| 20 | Help to put on cloths. | Promotes comforts. |
| 21 | Keep the patient in comfortable position and open curtains. | Promotes comforts. |
| 22 | Raised side rails as needed, lower bed and open curtains. | Promotes safety. |
| 23 | Educate to the patient and family about the importance of cleanliness, dryness, massage and position change. | Enhance client's knowledge. |
| 24 | Clean and replace all equipment in proper place. |
Leaves the unit clean and articles ready for further use. |
| 25 | Perform hand hygiene. | Prevents from cross infection. |
| 26 |
Record in the patient's chart including date, time and patient's general and back condition. Report to the senior staffs if found any abnormalities. |
Ensures communication between staff members. |
Nail Care
The appropriate upkeep of the fingernails and toenails is referred to as nail care. It entails occasionally shortening the nail and regularly cleaning the nails to maintain them clean.
The nail is a modified epidermis that is firmly linked to the densely populated nail bed of nerves and blood vessels. The nail is made up of the body and the free ends at the distal end, and the lunula, the white portion at the proximal end. The finger tips are supported and shielded by the nails.
Purposes
- to make the nail sterile and secure.
- help shield the body from infection and damage.
- to avoid dirt and microbes building up under the nails.
- Make the patient seem better overall.
- to look for or inspect the anomalies.
- to keep the skin around the nail intact, etc.
Principles
- Nail growth typically occurs every week and is 1 mm.
- Hot water, strong acids, and alkalis all work to separate nails from their beds.
- Cut the nail off as near to the skin as possible.
- The patient feels clean because of their hands and nails being clean.
- All sorts of germs thrive in the dirt that collects under fingernails.
- A person can get germs from their fingernails by eating or scratching them.
- Warm water soaks the nails, softening them and preventing them from breaking.
- Following the client's bath is the ideal time to undertake nail care.
Articles
- Tray-1,
- Mackintosh- 1,
- Towel-1,
- Nail-cutter with file-1,
- Cotton swabs,
- Kidney tray,
- Wash cloth /sponge towel,
- Warm water in a bowl,
- Gauge piece - some amount.
Procedure
| S.N. | Nursing Action | Rationale |
| 1 | Explain the purpose and procedure to the patient and visitor. | Reduces anxiety and encourages cooperation. |
| 2 |
Assess the condition of the surfaces of fingers, toes and nails; pay particular attention to areas of dryness, inflammation and cracking. Also inspect areas between toes, heels and soles of feet. Identify patients at risk for foot or nail problems e.g. older adults and diabetes patients. Assess capillary refill of nails. |
Integrity of feet and nails determines frequency and level of hygiene required. Helps to assess adequacy of blood flow to extremities |
| 3 | Assess patient's ability to care for nails or feet. | Determines patient's ability to perform self-care and degree of assistance required. |
| 4 | Wash hands with soap and water. | Reduce chance of cross infection. |
| 5 | Prepare all required articles and bring the articles to the patient's bedsides. | Facilitate to perform procedure. |
| 6 | Pull curtain around bed or close room door. | Maintain patient's privacy |
| 7 | Raise bed to comfortable working level. Lower side rails on the working side. | Use of good body mechanics prevents fatigue. |
| 8 | Assist the ambulatory patient to sit on a bed side chair. Help the bed ridden patient to the supine position with the head of the bed elevated. | Sitting position facilitates immersing feet in basin. |
| 9 | Wear the gloves. | Reduces transmission of microorganisms. |
| 10 | Spread a mackintosh on the bed. | Prevents wetting bed. |
| 11 | Fill washbasin with warm water. Test temperature and have it about 43 to 44 degree C. | Warm water softens nails and thickened epidermal cell, reduces inflammation of skin and promotes local circulation. |
| 12 | Place a bowl/basin on towel and help patient place feet in basin for soaking toe nails. Or Soak the feet nails with wet swabs. | Patients with muscular weakness or tremors may have difficulty positioning feet. |
| 13 |
Adjust over bed table to low position and place it over patient's lap |
Easy access prevents accidental spills. |
| 14 | Fill basin with warm water and place basin on towel on over bed table for soaking finger nails. | Warm water softens nails and thickened epidermal cell, reduces inflammation of skin and promotes local circulation. |
| 15 | Instruct the patient to place his fingers in the bowl and place arms in a comfortable position. | Prolonged positioning can cause discomfort. |
| 16 | Allow patients feet and fingernails to sock for 10 to 20 minutes. Rewarm the water if necessary. | Softening of corns, calluses and cuticles ensures easy removal of dead cells. |
| 17 | Dry the hands with towel. | |
| 18 |
Filing nails Where possible nails should be filed using the foot of the nails. dresser from the basic care podiatry set to reduce the length and thickness of the nails. |
Reduce the length and thickness of the nails. |
| 19 |
Cut the finger nails. Hold the client's fingers one to cut the nails. Clip fingernails straight across and even with top of fingers using nail clipper. Shape nails with file. Make the cut edge of the nail smooth by brushing them with a file. Clean under the surface of the nail with a blunt instrument or the longer end of tooth pick taking care not to injure the nail bed. Give the attention that there should be covered the nail with gauze piece during cutting it. And put nail on kidney tray or mackintosh. Clean the nails with wet swab after cutting the nails. Or Wipe each fingertip with cotton dipped in antiseptic solution. |
Cutting straight prevents splitting of nail margins and formation of sharp nail spikes that can irritate lateral margins. Protect eyes from flying nail pieces while cutting nails. |
| 20 |
Remove the mackintosh and cut the opposite hand nails in the same manner. |
|
| 21 | Remove feet from basin and dry thoroughly. | |
| 22 |
Clean and trim the feet nails in such a manner that cutting the toe-nail straight to prevent them from growing in ward and do not file corners of toenails. Remove the dirt under surface of the nail. Place the nail in a kidney tray. Cut the opposite feet nails in the same manner. Remove the mackintosh. |
Shaping corners of toenails may injure the nail-bed. |
| 23 | Apply lotion to hands and feet. | Wash and dry the nails; use ion lubricates to dry skin. |
| 24 | Keep the patient in a comfortable position. | |
| 25 | Clean and replace the articles after cleaning. Place nail cutter in antiseptic solution for 30 minutes then washes, dry and replace. Discard waste. | Reduce transmission of infection. |
| 26 | Remove gloves and wash hands. | Leaves the unit clean and articles ready for further use. |
| 27 | Health education should be given to the patient. | Provides knowledge about nail care. |
| 28 | Record the date, time, condition of the nails, abnormalities of nails and nail beds, etc. Report to the senior staff if find out any abnormalities. | Promotes communication among staff. |
Things to remember title
© 2021 Saralmind. All Rights Reserved.
 Login with google